News & Insights

How to Improve the Engraving Accuracy of Makerspace Laser Cutter?
Time: Oct 14,2024
Source: Good-Laser
Click count: 107
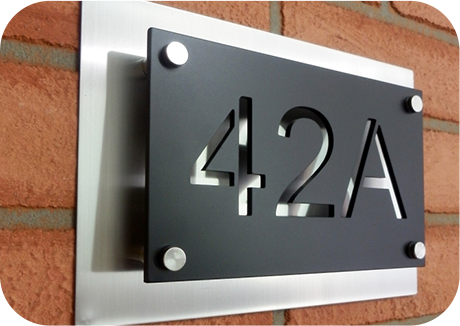
Laser cutters are essential tools in makerspaces, offering precision cutting and engraving on a variety of materials like wood, acrylic, leather, and more. In this blog post, as a laser cutter engraver supplier, Good-Laser will share how to improve the engraving accuracy of makerspace laser cutter to ensure high quality products.
1. Optimize Laser Focus and Spot Size
Achieving a sharp focal point is critical to precise engraving. The laser' s spot size (the smallest area to which the laser can be focused) directly impacts the resolution and sharpness of the engraved design. Follow these steps to ensure proper focus:
- Calibrate the Z-axis height: Many laser cutters have an adjustable bed or autofocus feature. Use the manufacturer' s recommended focus distance between the laser head and the material. If available, use a ramp test: place a material at a sloped angle and engrave a straight line. The sharpest part of the line reveals the optimal focus point.
- Spot Size Tuning: For finer details, use a lens with a smaller focal length (e.g., a 1.5-inch lens). A shorter focal length produces a tighter spot, ideal for fine engraving, though it reduces the depth of focus.
- Cleaning Optics: Dust or residue on the mirrors and lens can scatter the laser beam, reducing precision. Regularly clean optics with alcohol-based lens wipes to ensure beam clarity.
2. Control Laser Power and Speed Settings
The balance between power and speed determines the depth and quality of an engraving. Incorrect settings can cause overheating, charring, or uneven lines. Fine-tuning these settings based on the material and desired effect is essential.
- Use Test Grids: For each material, engrave a grid with varying power and speed values to identify the optimal combination. Materials like plywood require lower power to avoid burning, while acrylic needs higher power for deeper engravings.
- Frequency Modulation: For CO₂ lasers, control the pulse frequency (measured in Hz). Lower frequencies (e.g., 300 Hz) create cleaner lines on wood, while higher frequencies (e.g., 1000 Hz) produce smoother surfaces on acrylic.
- Power Stability: Laser tubes lose efficiency over time. To maintain precision, periodically measure the output power with a laser power meter and recalibrate settings accordingly.

3. Minimize Beam Drift and Mechanical Issues
Laser accuracy relies on the mechanical precision of the gantry system that moves the laser head. Over time, components can loosen or wear, leading to drift or misalignment. Regular maintenance ensures consistent performance.
- Gantry Alignment: Check the alignment of the X and Y axes to ensure the laser head moves perfectly perpendicular. Use a square ruler or machinist' s square to verify the alignment and adjust the belt tension if needed.
- Mirror Alignment: Many CO₂ laser cutters use multiple mirrors to direct the beam to the work area. Misaligned mirrors can cause the beam to hit off-center or lose focus. Use an alignment jig or target paper to adjust the mirrors so the beam path is perfectly centered at each stage.
- Lubricate Rails and Bearings: Dust and debris can cause friction on linear rails, reducing precision. Periodically clean and lubricate rails with non-greasy lubricants, such as PTFE or silicone-based spray.
4. Use Higher Resolution Settings (DPI)
The resolution of an engraving is measured in dots per inch (DPI). A higher DPI produces finer details by packing more dots in a given area but can increase processing time. However, not all materials benefit from extremely high DPI settings.
- Choose DPI Based on Material: Use 300 - 500 DPI for wood, as higher settings can lead to overburning. For acrylic, a higher DPI (e.g., 600 - 1000 DPI) can achieve a polished surface finish.
- Balance Speed with Resolution: Running a laser cutter at extremely high DPI with fast speed can reduce precision due to mechanical vibrations. If higher DPI is required, consider lowering the speed to avoid skipped steps.
5. Ensure Consistent Material Positioning with Jigs
Even minor shifts in material placement can cause engraving errors, especially for multi-step projects. A positioning jig ensures consistent alignment across multiple operations.
- Create Custom Jigs: Cut a template in cardboard or plywood that holds the material securely in place. This jig can be reused for batch engraving.
- Use Honeycomb Beds or Pin Tables: These systems prevent materials from warping or moving during engraving. The honeycomb structure also reduces back-reflection, improving the quality of engravings on reflective materials like acrylic.


6. Manage Temperature and Ventilation Systems
Temperature variations and poor ventilation can affect engraving quality, especially with delicate materials like wood and fabric.
- Control Ambient Temperature: Laser tubes are sensitive to temperature changes. Ensure the room temperature remains within the recommended range (typically 20 - 25°C or 68 - 77°F) to maintain stable beam output.
- Ventilation and Air Assist: Proper ventilation prevents smoke from interfering with the laser beam. Use air assist (a small air compressor) to blow smoke away from the engraving area, reducing the risk of scorching and improving detail clarity.
7. Software Calibration and File Preparation
Even with precise hardware, poor software settings can compromise engraving accuracy. Ensure the laser cutter' s software is properly calibrated.
- Optimize Vector and Raster Files: Ensure vector paths are closed and free of overlapping lines. For raster engravings, use dithering methods (e.g., Floyd - Steinberg) to create smoother gradients.
- Correct for Kerf: The kerf (width of the laser cut) can impact fitment when engraving or cutting precise components. Compensate for the kerf in design files by offsetting paths to account for material removal.
- Check for Software Updates: Regularly update both the laser control software and the firmware to ensure compatibility with new materials and improved engraving algorithms.
8. Monitor and Measure Output with Test Patterns
Accurate results depend on regularly verifying the laser cutter' s performance with standardized test patterns.
- Engrave Calibration Patterns: Use test patterns like grids, lines, and circles to assess the alignment and resolution of the laser. Compare the output against known measurements to spot deviations.
- Use a Dial Indicator for Bed Leveling: If your laser cutter has a movable bed, use a dial indicator to ensure the bed is level across the entire working area, preventing focus inconsistencies.
Conclusion
Improving the engraving accuracy of a makerspace laser cutter requires a mix of mechanical, optical, and software adjustments. Regular maintenance - such as mirror alignment, bed leveling, and optics cleaning - ensures consistent performance. Additionally, fine-tuning power settings, using positioning jigs, and managing environmental conditions help produce detailed, high-quality engravings. By implementing these strategies, makerspaces can enhance the precision of their laser cutters, delivering reliable results for all users.
Related News
-
 NewsSchool Laser Cutter | 03/01/2025Benefits of Student Using School Laser Cutter to Cut Creative WorksFind out more about our news >
 -
 NewsAcrylic CO2 Laser Cutting | 12/12/2024Daily Maintenance of Acrylic CO2 Laser Cutting Machine: Ensuring Precision and LongevityFind out more about our news >
 -
 NewsMerry Christmas! | 25/12/2024Celebrating Christmas with Good-Laser: Laser Cutter for EducationFind out more about our news >